Photo by Scott Sweegles |
Webmaster's Tips on
Taking Air-to-Air
Photos Safely
by Chris Claborne
|
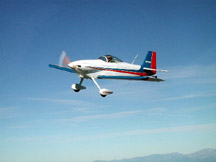
Photo by Bill Houle |
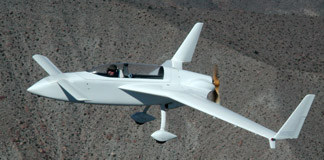
Photo by Bill Houle |
The following are guidelines
and tips that I developed for air-to-air photos. I would appreciate your tips
as well, so send me an e-mail.
For the Pilots, Safety First
- Establish procedures
before starting. Once everyone knows the rules and you have a
plan, it will reduce surprises and uncertainty. The role of
"leader" and follower can change hands but understand what the
responsibilities are.
- The lead aircraft has certain
responsibilities. The leader holds an agreed upon heading and is
locked on that heading. Constant communication is required.
Communicate any planned change to the other aircraft before executing.
The leader is looking for traffic and other obstructions, very little at the
other aircraft unless it is slipping to the forward quarter.
- The follower has
certain responsibilities. That pilot is generally lateral or
behind the leader. He keeps 100% visual of the leader, LOOK NO WHERE
ELSE. Constant
communication is required. Communicate any planned change to the other
aircraft before executing.
- Keep your distance.
I have no formation flying experience,
therefore, I stay a pretty safe distance from the other aircraft. Designate
who will be the leader. If the other aircraft wants to form up on me,
(I'm the leader) the air is smooth, and the other pilot is qualified to fly
formation, I let him come in a little closer while I hold a single solid
heading.
- Communication is
critical. Every move or change needs to be communicated before it
is executed. We share a air-to-air freq of 123.45.
- Don't fly and take
pictures unless you are at an extra safe distance. Normally my front passenger runs the camera from
the right seat. I just bought the 2X telephoto for the
Nikon 990 to improve the pictures while keeping a safe distance..
- Asking others to form
up on you. I normally ask the other aircraft to form
up on me (since I generally want them on the right and a little behind to
keep the strut out of the pictures). The other pilot MUST keep 100% visual on
me, LOOK NO WHERE ELSE. My job is to hold a solid heading
and keep in constant
communication with the other pilot.
- If I am forming up, I
keep 100% visibility of other aircraft, I LOOK NO WHERE ELSE. If I am coming in from behind, I am
pretty cautious and keep 100% visual (LOOK NO WHERE ELSE) and maintain constant communication. If I loose site of the other
aircraft, I take immediate steps to move away and re-group if the other
pilot can't see
me.
- Aircraft separation is
NEVER assumed. If 100% visual contact is lost by both pilots,
communicate and take
immediate steps to gently change direction away from the other. On a previous flight I was coming up from low & behind
on a Beach and lost him due to my high-wing as I slowly overtook. I immediately started
a gentle decent and then a turn away in a 360 to re-group on him. I
prefer to keep the paint that came with the airplane.
- High wing go high...
Obviously, I stay at or just a little
higher in my high-wing for pictures.
- Use a telephoto lens.
Why introduce risks when you can use technology to get closer.
- Fly the plane.
This is pretty obvious but don't forget that the PIC's first job is to look
for other planes, obstructions, etc. Don't let your photographic
session distract you from your primary duty. Normally this job rests
on the leader, who is holding a heading. The other pilot is
holding a 100% visual on the leader, and LOOKING NO WHERE ELSE. Bring along others to help
coordinate and look.
- Emergency procedures.
Agree on what the emergency procedures will be before entering into
session. One example of an emergency would be a radio failure.
Because I rarely enter into close quarters I hope this will be a non
issue. I will most likely disengage gently. This will most
likely prompt an attempt at communication thus revealing the problem.
- Safety first.
All the passengers of both aircraft assume that you are operating safely,
don't jeopardize that trust. After all, your first duty is to them.
Photographic Tips
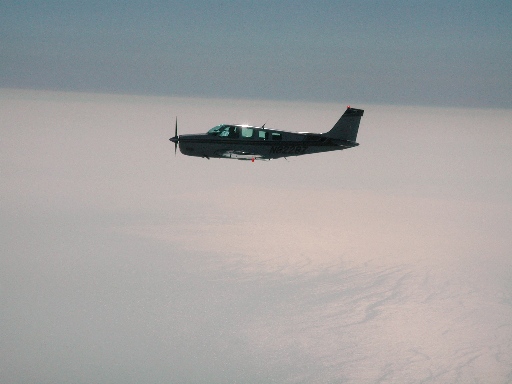
- Backlighting can kill
you. Digital cameras have a lower dynamic range than slide or
especially print film (which is the best). Dynamic range is the
number of shades of intensity that the device can record. Try to get
the plane in direct sun light. If you can't, hopefully you can
switch your camera's metering to spot or center weighted and take the
reading off the plan. Another way is to use your camera's exposure
compensation function for backlighting (over expose by at lease a 1/2
stop). This will compensate and give you better pictures but the sky
will be over exposed... what do you want??? If you are shooting
print film and you get a good shot, you can digitally mask off the plan
and sky on the computer, change the exposure of each, and end up with a
perfect picture. Backlighting can be the ticket though if you are
looking for a cool
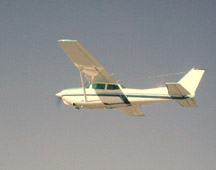
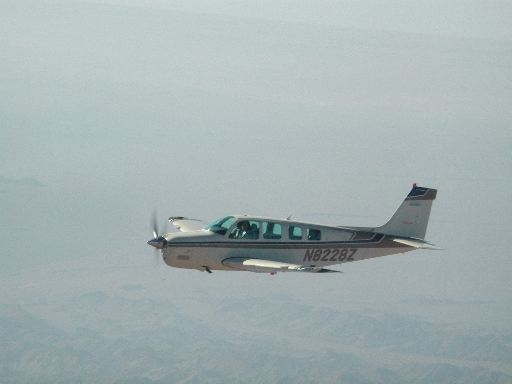
silhouette. We were out shooting the bonanza (at the top of
this page) and had a heck of a time fixing the lighting when we got
back. If we had just turned so the light was on him, we would have
had some real winners.
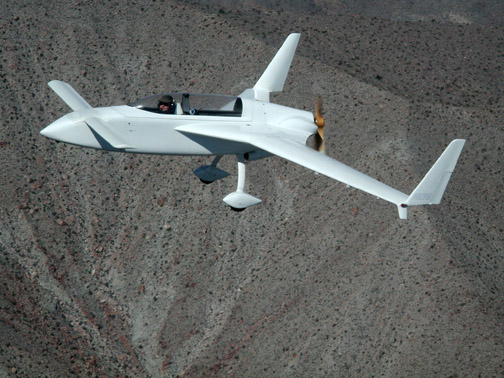
- Use a telephoto lens.
Why introduce risks when you can use technology to get closer. Also,
using a telephoto causes the foreground and background to be a little more
compressed (the effect is to make the background look closer to the plane
than it really is). The down side is that sometimes it is harder to
get a sharp photo. For one, the you loose a little light in most
telephotos (unless you spent big $) so the shutter is moving a little
slower. Another reason is it's harder to hold the image still.
It's also sometimes harder to focus an auto-focus camera since it needs to
acquire the other plane steadily for a second to get a lock (unless you use
something high powered, like my Nikon F5). This
photo makes the aircraft look like it's right next to us, but it was
actually a nice safe distance away. Notice also how it compresses
the background, making the plane look closer to the ground than it really
is. Be careful though, we had a few photo's from this session mainly
because the telephoto makes it hard to keep the image steady.
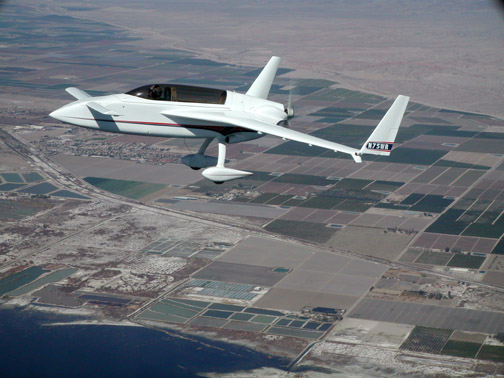
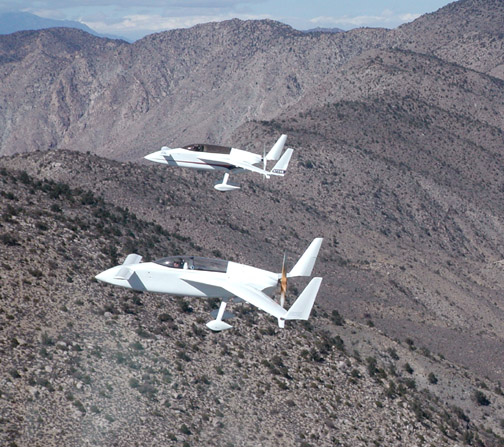
- Try to get something in the background. Now
it's starting to get tougher. If you are below, all you will get is
the sky (not bad if you have some cool clouds but sometimes that's the
angle you want). Taking pictures through the smog below is the
toughest. Mountains are great because they are usually above the smog and
haze of the city and a little closer. I haven't used the ocean yet
but I would imagine that would also give you a nice background especially
if it was along the coast. Here
is a solo pic that had a nice background but a little busy. Here
is another with a good background and it provided good contrast.
Probably a good example of what not to do in this context is the picture
of the blue and white Cessna at the top of this page (I include it here
because it's me, up there, looking at you)
- Shooting through aircraft windows is murder!
Aircraft windows are plastic and even when brand new, they shift the color
coming in (your eye can't tell however). Some are worse than others
and if the plane is old or sits outside, the plastic is discolored from
the sun. The plastic also introduces distortion, not only pure light
distortion but also how each color lines up on the film plane reducing
sharpness. Each aircraft is different. A friend of mine took
some pictures from a Beachcraft and the color shift was minimal whereas my
pictures required a lot of re-working. We both had the same camera
(Nikon 990). The pros pop the windows off (not sure the owner of my
aircraft would appreciate this). With this said, it's obvious that the
best way to fix photos is on the computer.
- Go digital!. If you use slide or print, try
to scan the positive/negative. Having a digital darkroom is a
perfect companion for this activity. You can not only fix the color
shift problems but also improve contrast (in murky skies this is great),
and you can crop, zoom and compose the finished product the way you really
want. Don't forget (see backlight above) that print film gives you
the most options when shooting high contrast scenes.
- My camera of choice for shooting digital is the Nikon
990. It's a 3.34 million pixel resolution camera, giving you
nice 8 x 10 enlargements. More importantly, it gives you more
control over exposure, allowing you to compensate (if you remember) for
backlighting as well as a host of other features for depth of filed and
different modes for action and portrait. In my opinion, it's the
best consumer digital camera out (a lot of print magazines agree with
me). See a review at http://www.dpreview.com/reviews/nikoncp990/.
If I am going to get serious, I would use my Nikon F5 and burn up lots of
film.
- Don't forget to have fun!
The February 2001 issue of Aviation Safety has an article on
conducting photo sessions and what happens to those who aren't careful.
Thanks to Tony Texeira for his review and input.

Return to Tony
Tex Home
Site developed and powered by 
